Jumat, 22 November 2013

image zushioda tanjung duren.jakarta barat

steak lidah sapi ala chef gusty.zushioda tanjung duren..jakbar


steak lidah sapi ala chef gusty.zushioda tanjung duren.jakarta barat – Steak atau bistik merupakan sepotong daging yang besar, dan biasanya daging yang digunakan adalah daging sapi, dada ayam, daging merah, dan juga ikan. Namun pernahkah anda mencoba steak yang terbuat dari lidah sapi. Karena kali ini kami akan memberikan kepada anda sebuah resep masakan steak dengan bahan utama yaitu lidah sapi. Beranikah anda mencoba menu makanan yang satu ini.


jika anda ingin mencoba membuatnya dirumah, maka anda bisa melihat terlebih dulu Resep Steak lidah sapi ala chef gusty.... yang akan kami hadirkan untuk anda berikut ini.

Cara Membuat

Bahan dan Bumbu Steak Lidah Sapi
  • 500 gram lidah sapi
  • 2 cm jahe , memarkan
  • 6 butir bawang merah , iris tipis
  • 3 butir cengkeh
  • 3 cm kayumanis
  • 90 ml kecap manis
  • 2 buah tomat , potong potong
  • 1 buah paprika hijau , potong kotak
  • 1.000 ml air
  • 2 sdm saus tomat
  • 1 sdt garam
  • 1/2 sdt pala bubuk
  • 1/2 sdt merica bubuk
  • 1/2 sdt gula pasir
  • 500 ml air
  • 3 sdm margarin untuk menumis
Untuk Bahan Pelengkap
  • 100 gram wortel mini , kupas, rebus
  • 200 gram kentang mini , kupas, goreng
  • 50 gram jagung putren , belah dua memanjang, rebus
  • 50 gram buncis mini utuh , rebus
  • 2 siung bawang putih , cincang halus
  • 1 sdt peterseli cincang
  • 1/4 sdt merica bubuk
  • 1/4 sdt garam
  • 1 sdm margarin untuk menumis

Cara Membuat Steak lidah sapi ala chef gusty..!!

  1. Rebus lidah sapi bersama dengan jahe dalam air selama 10 menit hingga mendidih, setelah itu angakt dan kupas kulit lidah sapi.
  2. Kemudian rebus kembali lidah sapinya hingga matang, lalu angkat dan buang airnya. Kemudian potong daging dengan bentuk tipis melebar, dan sisihkan.
  3. Setelah itu tumis bawang merah, cengkih, dan kayu manis hingga harum. Lalu masukan paprika hijau dan tomat, aduk dan masak kembali hingga layu.
  4. Berikutnya masukan lidah sapi, dan aduk hingga rata. Setelah itu tambahkan saus tomat, kecap manis, pala bubuk, merica bubuk, gula pasir, dan garam. Aduk hingga semua bahan tercampur dengan rata.
  5. Lalu tuangkan air sedikit demi sedikit sambil diaduk-aduk hingga matang, kemudian angkat lidah sapi dan tiriskan.
  6. Selanjutnya goreng lidah sebentar saja, asal warna lidah sapi berubah kecoklatan menggunakan 2 sdm margarin. Angkat dan sisihkan lidah sapi.
  7. Membuat pelengkap, tumis bawang putih hingga harum, setelah itu tambahkan wortel, jagung putern, buncis, dan kentang. Aduk hingga semuanya tercampur dengan rata.
  8. Kemudian tambahkan peterseli cincang, merica bubuk, dan garam. Aduk kembali hingga rata kemudian angkat.
  9. Sajikan lidah sapi bersama dengan pelengkapnya.

resep sederhana aja


resep ala chef gusty.zushioda tanjung duren.jakarta barat – Jika anda merasa bosan dengan menu masakan dari nusantara ini, maka anda bisa mencob menu masakan asal jepang yaitu suhsi. Cara untuk membuatnya juga tidak begitu susah dan tidak membutuhkan bahan-bahan yang mahal, anda bisa membuat sushi sesuai dengan lidah anda. Dengan memilih bahan-bahan yang anda sukai.
Nah, buat anda yang ingin mencoba membuat sushi dirumah, maka anda bisa melihat terlebih dahulu Resep Masakan Sushi Ala Indonesia Sederhana yang akan kami sajikan khusus untuk anda semua.

resep ala chef gusty.zushioda tanjung duren.jakbar

Bahan Untuk Membuat Sushi Ala Indonesia
  • Nasi secukupnya
  • 1 lembar nori atau rumput laut kering berbentuk lembaran besar
  • 1/4 bagian timun yang dipotong memanjang
  • 1 butir telur, kocok lepas, buat dadar bulat lebar, tidak perlu tebal
  • 1 buah sosis rasa ayam atau daging sapi

Cara Membuat Sushi Ala Indonesia Sederhana

  1. Pertama siapkan penggulung sushi, lalu letakan selembar nori diatas penggulung suhsi tadi. Dan ratakan nasi diatasnya.
  2. Kemudian susun telur dadar, sosis, timun diatas nasi. Lalu gulung nasi hingga berbentuk padat.
  3. Setelah itu iris sushi sesuai dengan selera anda, dan sajikan sushi bersama dengan wasabi atau mayonaise.

resep suhi praktis


Resep Sushi Praktis
 
Bahan :
- Nasi secukupnya
- 1 lembar nori atau rumput laut kering
- 1/4 timun, potong memanjang
- 1 buah sosis rasa ayam atau sapi
- 1 butir telur, kocok lepas dan buat dadar bulat lebar dan tidak terlalu tebal

Cara Membuat :

  • Siapkan penggulung sushi yang bersih, kemudian ratakan nasi dengan menggunakan gulungan tersebut hingga nasi menjadi padat.
  • Setelah itu taruh nori pada atas nasi, sisihkan.
  • Siapkan telur dadar yang telah dilebarkan sebelumnya, lalu susun sosis dan timun di atas telur dadar.
  • Gulung isi sushi tersebut dengan menggunakan penggulung susho hingga nasi menjadi padat.
  • Iris sushi dengan ketebalan sesuai selera.
  • Untuk lebih mudah, sahabat juga bisa menyusun nori terlebih dahulu, kemudian nasi dan isian lainnya di atasnya.
  • Untuk menambah kelezatan sushi, sahabat bisa menyajikan sushi dengan wasabi atau mayonaise.

resep sederhana sushi


Resep Sushi Sederhana
 
Bahan :
- 20 sendok makan nasi pulen
- 2 box nori (rumput laut)
- 10 tetes cuka
- 2 sendok teh gula pasir
- 1 sendok teh garam
- 3 sendok makan air matang

Isi :
- 4 lembar daging asap
- 6 potong chicken nugget bentuk stik,goreng
- 1 buah timun, belah 4, buang polar tengahnya, rendam dengan kecap asin
- 1 buah wortel. belah 4, rebus, rendam dengan kecap asin
- 2 buah telur, dadar tipis-tipis jadi 2 lembar

Cara Membuat :

  •  Larutkan cuka, garam dan gula dengan air, kemudian campur dengan nasi pulen hangat. Setelah itu aduk hingga rata.
  • Siapkan selembar plastik 2 kg yang tahan panas, letakkan 1/2 adonan nasi tadi di dalamnya, tekan dan ratakan agar berbentuk lembaran pipih, kurang lebih 1/2 cm.
  • Atur isi sushi, letakkan telur dadar, taruh diatasnya 2 lembar daging asap, timun, chicken nugget stik, wortel lalu gulung.
  • Letakkan nori di atas lembaran adonan nasi pipih, balik dengan bantuan plastik dengan posisi nori di bawah, tekan-tekan agar nori lengkap dengan sempurna pada nasi.
  • Letakkan gulungan isi sushi pada tepi lembaran nasi+nori tadi, kemudian mulailah menggulung dengan bantuan plastik tadi, padatkan.
  • Buka plastik, potong golungan sushi dengan hati-hati setebal kurang lebih 2 cm.
  • Setelah itu sushi siap disajikan dengan kecap asin atau wasabi jika sahabat suka.

resep sushi tradisional


Resep Sushi Tradisional Jepang
  
Bahan :
- 540 gram (2 1/2 cangkir) beras koshihikari
- 200 gram salmon segar, potong 1 cm
- 935 ml (3 3/4 cangkir) air dingin
- 125 ml (1/2 cangkir) cuka beras
- 2 sendok makan gula kastor
- 1/2 sendok teh garam
- 6 lembar nori
- 1 alpukat, belah 2, kupas, iris tipis, cincang

Penyajian :
- Saus kedelai
- Pasta wasabi
- Acer jahe

Cara Membuat :

  • Taruh beras kedalam sebuah saringan, kemudian cuci beras dengan air dingin yang mengalir hingga bersih. Setelah itu taruh beras dan air ke dalam panci besar, tutup, masak dengan api besar, dan didihkan. Kecilkan api dan tutup selama 12 menit atau hingga air terserap, angkat dan sisihkan. Tutup selama 10 menit.
  •  Campur cuka, gula dan garam dalam mangkuk kecil, kemudian pindahkan nasi ke dalam mangkuk kaca besar, aduk nasi dengan menggunakan pengaduk kayu, setelah itu secara bertahap tambahkan cuka, aduk perlahan hingga rata. Tunggu selama 15 menit hingga nasi menjadi dingin.
  • Taruh alas sushi pada telenan, tempatkan lembaran nori, bagian mengkilap menghadap ke bawah, di atas alas. Sebaiknya tangan masih dalam keadaan basah untuk menyebarkan nasi secukupnya di atas lembaran nori, sisakan 3 cm pada tiap sisinya.
  • Taruh salmon dan alpukat pada bagian tengah nasi, tahan isian di tengah sambil menggulung alas. Lakukan cara tersebut hingga nori habis.
  • Gunakan pisau tajam untuk memotong-motong sushi dengan tebal potongan 1,5 cm. Kemudain tarih di atas piring dengan kecap, wasabi, dan acar jahe sesuai selera.

sushi rice


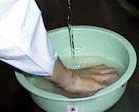
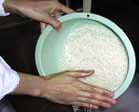
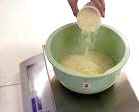
1. Measure the rice (White Short Grain or Medium Grain)

It is desirable to accurately weigh the rice with a scale (as the quality of cooked rice tends to vary if not weighed). If using a measuring cup, make sure to level off the top, as the cup tends to yield an amount different from the desired amount.

The type of rice used is optional, depending on taste. However, the following conditions should be maintained:

a. [Bad] grains should be kept to a minimum ([bad] grains are those that are white-cored, broken, cracked, immature, or grown under adverse conditions).

b. The rice should be properly milled, leaving a sheen on the kernels with no bran residue on the germ.

c. Sufficient moisture set at a level higher than 14% is preferred. Sufficient moisture protects against cracking during water absorption, but too much water gives rise to mold.

d. The rice should have been milled less than a week before the date of cooking.

e. The optimum amount of rice to be cooked at once should be no more or less than about 80% of a rice cooker's capacity.

2. Rinse the rice

First, add water to the measured rice and drain quickly. Next, add water one more time and wash the rice gently so as not to break the grains, then drain. Repeat the second procedure a few more times (about three times in all).
If using an automatic rice washer, set the operating time at less than three minutes.

Immediately after rice has had contact with water, the water starts permeating the rice, which also transports the bran content into the kernels, so the first washing and draining should be completed swiftly.
Modern, advanced milling techniques allow only a small amount of bran residue to remain on the refined grains. Therefore, care must be taken not to scrub the rice, which causes cracking, but to lightly "rinse" the grains.

3. Soak the rice

Let the rice soak in the water long enough so that the water reaches the innermost part of the grains. Suggested times for soaking are one hour in summer, two hours in winter.

When soaking is completed, the weight of the rice increases by 1.25 to 1.30 times that of the uncooked rice, and the rice becomes powdery when strongly rubbed together between the fingers.

4. Add water to the rice

Drain the water after soaking is finished, and add fresh water before cooking. The amount of the water added depends on taste; however, a rule-of-thumb is shown below:
Soaking and adding water are regarded as one step. Note the following formula:
[The amount of water absorbed during soaking + the amount of water added (before cooking) = Total amount of water to be added]
The suggested amounts of total water to be added:


a. sushi_rice(Sticky Rice)

: The weight of the dried rice x 1.30 - 1.35
(for example)
: Rice 3.6Kg(7.9lbs)

After soaked weight 4.6Kg(10.1lbs)=1kg(2.2lbs) of Water absorbed
3.6Kg x 1.30 = 4.68Kg(10.3lbs)(Total amount of water)
So,adding water is 4.68Kg - 1Kg = 3.68Kg(8.1lbs)

If the cooked rice is to be kept in a chilled room, add extra water to the rice, depending upon the conditions of the room. (Sushi seasoning should be included in this amount.)

b. Cooked Rice

The weight of the dried rice x 1.40 - 1.50(for steamed rice)

*The amount of water added

If soaking conditions are standardized, it is acceptable to use the amount of water added to the soaked rice as a yardstick. The appropriate amount of water to be added fluctuates greatly, depending upon the quality of rice. If changing the type of rice or switching from old to new harvest grains, and vice versa, the rice should be test-cooked to check for the optimum amount of water to be added.

*The quality of water

Rice cooked in hard water tends to be harder, but the quality of water does not pose specific problems unless it is of an extreme hardness. Any chlorine smell may be effectively removed with a water purifier.

5. Steam the rice

Select an appropriate heat control according to the directions on the automatic rice cooker. Monitor the time needed to allow the rice to [settle]. It is indispensable to allow time for the rice to settle, in addition to the cooking process, in order to obtain the necessary amount of heat to cook rice. Cooking (or heating) time is typically 20 to 25 minutes,(1)
The time needed for rice to settle is typically about 20 to 30 minutes.(2) After finished

20 to 25 minutes
(1)Heating Start
Heating Finish about 20 to 30 minutes
(2)For rice settle

The reasons why rice should be allowed to settle after cooking are as follows:

[1] Moisture distribution in the cooker is uneven immediately after cooking. By allowing time for the rice to settle, any extra moisture on the surface of the grain is evaporated, thus evening out the moisture content of each grain.

[2] Gelatinization is incomplete unless the rice is kept at a temperature higher than 98degrees Celsius, or about 210 degrees Fahrenheit, for approximately 20 minutes. The cooking process alone does not provide enough heat (a temperature over 98degrees Celsius), a condition which is compensated for by allowing time for the rice to settle.
Maintain a high surrounding temperature while allowing rice to settle.
When the rice is allowed to settle for too long, it loses sheen. When it cools down, it becomes sticky, making it difficult to separate individual grains from each other.

6. Add Sushi Seasoning to the rice


Sushi Seasoning
Wet a wooden rice-cooling tub, or HANGIRI, and pour the cooked rice in it. Sprinkle the prepared vinegar mixture(Sushi Seasoning)over the rice while hot (the temperature of the rice should be over 90degrees Celsius, or about 190 degrees Fahrenheit).
Fluff with a rice paddle, by moving it from the bottom up, to coat the rice evenly with vinegar. Quickly break up any chunks with the paddle to prevent [balls] from forming.
Use a gentle cutting motion of the paddle, rather than mixing the rice into a paste. At the same time, fan it with a rice-cooling fan, or UCHIWA, to cool it down slightly.

If the temperature of the rice is too low when adding Sushi Seasoning, the rice becomes sticky, forming hard-to-separate [balls]. Furthermore, the rice loses its sheen and its surface becomes rough.

7. Cool the rice

It is recommended to keep the rice at [body temperature], between 30 and 40degrees Celsius (approximately 86 to 104 degrees Fahrenheit), for [molding], or forming the rice into various shapes. Control the cooling process so as to reduce the temperature to this range at the time of molding. High temperatures may cause water condensation in the rice container, leading to stickiness and discoloration of rice. To avoid this, the rice should be slightly cooled to at least 60degrees Celsius (132 degrees Fahrenheit) prior to molding.

8. Mold the rice

Be careful not to smash the rice grains and make them too sticky. It is desirable to keep the sushi_rice at body temperature between 30 and 40degrees Celsius (about 86 to 104 degrees Fahrenheit) for molding. If using a molding machine, it is helpful to add salad oil to the rice before cooking, or spray it onto the machine to enhance its performance.
  

(*)(for example): Rice Cooker Maximum Capacity 5.6L (1.43 Gallons) = 4.5Kg(9.9lbs) Maximum

Desirable Rice Weight 3.6Kg(7.9lbs)